Meet Maria! Our featured Before + After reader today!
I’m a relatively new DIYer, started a couple of years ago in Las Vegas, NV. Took classes at Bloom (3 locations in NV) and fell in love with chalk paint and vintage furniture. Recently moved back to the DMV and was looking for a place to continue my vintage obsession. So glad I found Stylish Patina! love love love 🙂 |
|
Tell us about your project or redesign: | |
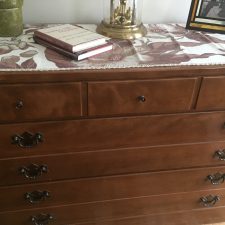
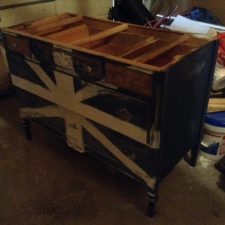
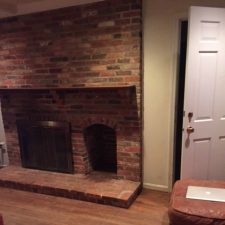
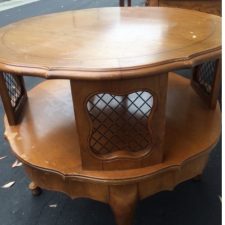
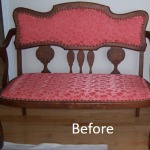
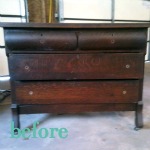
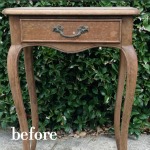
Got this vintage French provincial table from a fabulous seller on etsy and redid it in French Linen with gold trim, craqueleur finish and dark wax. Used a pretty stencil on top. |
Search Results for: before and after
Before + After Lamp
Today’s Before + After is from Tarah Lynn in Northern Minnesota. A little bit about Tarah in her words “I’m from northern Minnesota and just concluded a full fifteen month renovation of my grandparents’ 100 year old farm house with my new husband. (After finishing the house we moved in and then two weeks later had our wedding in the backyard!!) Everything is DIY around here, I can’t bare it (whether I can afford it or not) to hire someone to do something I am perfectly capable of doing myself. I adore furniture refinishing and dream of the day I can literally retire and do it all the time.”
About this before + after she submitted. “Paint an old lamp white for a brand new look! First, some back story: upon merging our households, Joe wanted to throw most of his furniture away. I allowed it with three pieces: A 1960s round coffee table made of particle board that looked about ready to collapse and two (very old) upholstered chairs, one was an orange rocker (that was broken and on its literal last legs) the other was a big green giant that was mostly held together with green duct tape. My aunt snatched the coffee table before it could be tossed (thank goodness because I was feeling really bad about that) but the two chairs got tossed and I remain pretty disgruntled about it… I mean… we certainly could have put them in the garage for a hang out spot… totally should have saved them. I know, its a sickness, but I’m just not any good at throwing anything away! Anyway, when he tried to toss this lamp I just shook my head at him. It was outrageously gaudy and grungy and not our style in any conceivable way but I knew a little bit of painting might just transform it.”
You can check out her blog at www.grandmashousediy.com.
BEFORE …..eek
AFTER….love!
See more Before + Afters here!
Before + After
I love these before and afters from Denis & Martine Chercuitte. They love the thrill of the hunt and shared a few of the pieces they have recently reinvented with us. I am a sucker for a french chair before + after!
I hope these before + afters will inspire you to look beyond and make something beautiful!
Before + After
Today we have a fun before + after from Christina at the shop. Here is her road side fine. Thanks to her husband for spying this great find and helping her to pick it up!
Christina used our General Finishes Java Gel on the top and then Chalk Paint® on the base. You can buy the gel stain and Chalk Paint at the shop or online.
We just LOVE this transformation, come into the shop and chat with us about your projects! We are always happy to share any tips and advice to help make your project special.
Before & After: Dining Table Redo
This week’s before and after project is from Bann, a chalk paint fanatic. Take it away, Bann!
“I’ve toted this tile-top table around with me from apartment to apartment because it was small and cheap, but I’ve never been in love with it. After finding a set of chairs I couldn’t resist, I decided it was finally time for an update! I used Bondo to fill in the grout lines and Annie Sloan’s burgundy chalk paint to coordinate with the chairs. I love the results!”
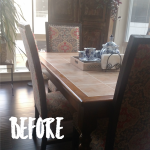
Here is the before of Bann’s tiled-top dining table.
“My apartment is full of lots of DIY adventures and plenty of chalk paint!”
Here’s Bann’s completed project – a colorful & fun table that compliments her decor perfectly!
Come and see us at Rough Luxe Warehouse, we are open from 10-5 each Saturday in March + April. Don’t forget our flagship Stylish Patina shop in Falls Church is open 7 days a week! Interested in seeing our furniture inventory? Check out our Etsy Shop, for all the details. New furniture is added each week!
Before & After: Mudroom Makeover
This week’s before and after is from Kristin – an interior designer who totally rocked her mudroom makeover. Take it away, Kristin.
“Hi! I’m Kristin Thompson, an interior designer and mom to three. I live in the West Michigan area. My hubby and I also own a remodeling company, so we are constantly buying ugly houses and making them pretty room by room! I have a million projects I have already done to our house, but I’m sharing our mudroom project!”
“We had an unfinished breezeway with concrete floors, and we remodeled the room to create a functional mudroom for our family of five (plus puppy).”
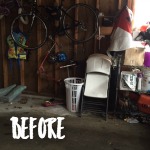
Here’s the before shot of Kristin’s mudroom.
“We created lockers, charging stations, a command center, recycling area, and an area for our guests. We did it all on a budget, so to save money, I painted our existing concrete floors. I used porch paint and custom mixed the colors, and hand-painted large floral and geometric designs on our floors. I sealed it with four coats of clear epoxy. We love it-it is fun yet easy to clean. The whole project took about 20 hours and $80 of material.”
Annnnd here is Kristin’s amazing new mudroom.
Come and see us at Rough Luxe Warehouse, we are open from 10-5 each Saturday in March + April. Don’t forget our flagship Stylish Patina shop in Falls Church is open 7 days a week! Interested in seeing our furniture inventory? Check out our Etsy Shop, for all the details. New furniture is added each week! And you can shop chalk paint + supplies in our online shop, click here for that.
Before & After: Fireplace Facelift
Today’s before & after shows just how versatile Annie Sloan chalk paint is in your home. There is hardly a surface you can’t use it on to give unexpected areas of your home a much-needed facelift.
Lisa D, a former Stylish Patina employee, submitted this week’s fireplace facelift, here’s this from Lisa, “I’m an HGTV addict and a Stylish Patina fan – in fact, a former employee who learned about Annie Sloan Chalk Paint by working a few hours a week in your wonderful shop.”
In getting my Winter Hill condo ready for sale I realized that my fireplace needed an inexpensive facelift – which is likely true for many of the brick rambler owners in the Northern Virginia area. I thought I could put my chalk painting skills to work, and am thrilled with the results.
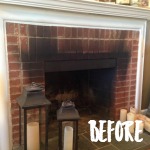
Here’s the before shot of Lisa’s fireplace.
Here’s Lisa’s process for transforming her fireplace:
*I first used Simple Green to wash the worst of the creosote off the brick
*I mixed Annie Sloan Old White with a little water and used my Annie Sloan brush to give the fireplace a “thin” first coat; the brush was great on the porous brick and for getting into the mortar lines.
*The brick soaks up a LOT of paint. I had thought a sample size pot would be enough, but realized I should have bought the quart size since the brick is so “thirsty.”
*I used almost “full strength” paint for the second coat and then went back over the bricks with the most smoke staining with a third coat.
*The result is a “whitewashed” look that is more up-to-date and ready to go on the market.
Here’s Lisa’s transformed fireplace.
Bravo Lisa, your fireplace looks modern and fresh.
Come and see us at Rough Luxe Warehouse, we are open from 10-5 each Saturday in March + April. Don’t forget our flagship Stylish Patina shop in Falls Church is open 7 days a week! Interested in seeing our furniture inventory? Check out our Etsy Shop, for all the details. New furniture is added each week!
Before & After: Barn Dresser
Today’s before and after, while it doesn’t feature paint, is a truly *magical* DIY story.
Tarah, a Stylish Patina fan from far away submitted this project to us, a salvaged barn dresser. Read Tarah’s story below!
“I’m from northern Minnesota and after fifteen months remodeling my Grandma’s 100 year old farm house we moved in, got married, and live and breathe DIY!” We’re already sold, Tarah!
“This old dresser was a find out in the barn, I loved how big and heavy it felt and I had the suspicion that it was probably walnut. I don’t know which one of my grandparents’ this piece belonged to but I am so glad I was able to keep it and make it beautiful again!”
“I sanded the whole thing down instead of stripping it and it just about killed me, definitely should have stripped all of the funk and gunk off of it first. I felt like my arms were gonna fall off. I just sanded. And sanded. And sanded. *facepalm* The whole dresser probably has over ten hours of just me sanding into it. However, in the end, once I saw those beautiful tiger stripes across the drawers, my heart just soared and it was so worth it!” said Tarah.
Talk about serious commitment to DIY.
And, here’s Tarah’s beautiful restored dresser.
Feeling inspired? Purchase chalk paint in our online or retail store, click here. Need to sharpen your skills? We’ve got classes for this – click here to register for our chalk paint classes!
Before & After: Sweet Side Table
We’re excited to share a sweet little reader submitted before and after today! We love seeing what you can do with a can of chalk paint and a little creativity.
Today’s project was submitted by Julie, and her excitement for DIY will seriously inspire you to get busy this weekend.
“I am DIY obsessed! It’s truly amazing how a little paint and new hardware can bring an antique back to life! This was a side table that I scored for free from a friend. Check your neighbor’s curb on trash day or visit a flea market on the weekend. You will be sure to find a diamond in the rough for next to nothing,” Julie said. We could not agree more with the curb score idea, so many good treasures in other folks’ trash!
“I absolutely LOVE, LOVE, LOVE painting with Annie Sloan Chalk Paint. There is no priming, no sanding, no hassle!” said Julie. Oh Julie, you are a woman after our own heart. That’s why we love chalk paint so much, too!
Here’s Julie’s before shot.
Here’s Julie’s supplies & a shot of her table mid-project.
And here is Julie’s finished project! Looking so sweet & perfectly refreshed.
Feeling inspired? Purchase chalk paint in our online or retail store, click here. Need to sharpen your skills? We’ve got classes for this – click here to register for our chalk paint classes!
Before & After: Chalk Paint Sofa
This week’s before and after is from Kimberly, a seriously creative DIYer. She transformed a sofa from blah to beautiful – using chalk paint! Read on to learn how she did it.
“The Couch began as your basic Queen Anne Style Sofa, with a neutral, linen/blend upholstery.”
Here’s the before of Kimberely’s sofa.
“I first steamed it and then jumped in head first with painting the fabric! This was actually my first chalk paint project…what can I say I am a brave woman if nothing else! I wanted a kind of emerald green look, inspired by the beautiful, velvet deco-style couches that are about $4k out of my budget,” said Kimberly.
“So, I mixed 4 parts Antibes +1 part Florence to get a gorgeous Emerald shade, with the help of Annie’s colorways and the lovely and brilliant Heather at SP! I actually had about a quarter of a can left which was surprising. I think technique is so key here,” said Kimberly.
“After watching some Youtube videos and winging it, I realized that the best way to paint fabric (luckily this one did not have a real nap to sand down afterwards, like velvet would) is to first think of the paint as a wash or a dye which can change the base of your fabric, and then apply it as paint. So I blended down the paint, with about 2 cups of ASCP to 1/4 cup water. This made is really easy to get down into the niches and crannies, especially the welting. Oh the welting! My goodness I swear I went over the entire couch several times in varying lights, finding new missed spots each time. Daylight is of course best, but don’t we always end up finishing projects late at night?! So good work lamps are key here I think,” said Kimberly.
Here it is, after the first ‘wet’ coat:
“I would note that a common tip online is to use a spray bottle to moisten the fabric and then paint it with the water/ASCP blend. Myself, being of the “let’s get on with it variety”, (like Annie!) decided this took too long with my pitifully tiny spray bottle, so I moved more toward the “dippy” method, i.e. dipping brush in water, then paint+water mix and applying. This worked beautifully. The paint really spreads nicely with enough moisture. I also painted the wooden legs, which of course ASCP covers beautifully,” said Kimberly.
“Then, by my 3rd and final coat, I simply painted with a damp brush, using a full paint mixture. I didn’t have to do that many coats, but with the brocade patterning in my fabric and the dark red stripes which I did not want showing thru for the look I had planned, three were necessary. The darker, monochrome color really brought out that brocade, in the same way that dark wax kind of brings out the architecture of a piece in a completely new way. This was even more enhanced by the clear wax coat,” said Kimberly.
Here’s her sofa with the final coat of paint, no wax yet (keep scrolling, you don’t want to miss the final product.)
“I finished up with a generous coating of clear wax, wiping away excess as I went, but fabric absorbs more than wood, just like with the paint. I did two coats of clear wax, then distressed the legs with sandpaper. It’s true that the clear wax actually gives a leather-like finish, especially once buffed. I almost didn’t believe it until I saw it myself. Also makes the piece a bit more ‘life-proof’ as it’s a sealant,” said Kimberly.
Here’s the sofa with it’s coats of clear wax (just a few more steps until this beauty is complete!).
“I sort of hemmed and hawed about whether to apply dark wax as I originally planned, because it looked so cool. I decided to give it a try. It looks amazing. A bit scary though at first. I did have to remove some with light mineral spirits as the wax doesn’t blend very well upon application, but the effect was well worth it. Now if only no one spills anything on it over the next couple weeks while it cures,” said Kimberly.
Here’s the sofa with its first coat of dark wax, before Kimberly worked her magic with mineral spirits.
And…here is the final product. A seriously chic green sofa!
Thanks for sharing your DIY story Kimberly! The sofa is simply fantastic.
Feeling inspired? Purchase chalk paint in our online or retail store, click here. Need to sharpen your skills? We’ve got classes for this – click here to register for our chalk paint classes!
Before & After: Cabinet Refresh
This week’s before & after comes from Mary Spence Smith, a Stylish Patina customer. Take it away Mary!
“I live in Oakton, Virginia with my husband and my dog, Abby. I love cooking, reading, tennis, my amazing girlfriends, hanging out with my boys and a good DIY project,” says Mary.
“I love a good project. I have never liked my china cabinet (which predates me in my 30 year marriage) but I couldn’t justify ditching it for a new one. Then I discovered Annie Sloan Paint at Stylish Patina.”
Here’s a before shot of Mary’s cabinet.
“My husband and I own Bullseye Wood Specialties, a custom cabinetry shop, so I admit that I had help in this restoration. My carpenter made new soft close drawers for me and new doors. We put mirror in the back of the cabinet to bounce light. We used Annie Sloan Old Ochre and left the top of the lower portion in the dark cherry to match my table. Italian-made hardware topped it off. I now adore this piece. Thank you Annie Sloan and Stylish Patina for providing the inspiration!” says Mary.
And here is the gorgeous after of Mary’s cabinet – it looks so good & we’re loving that you installed soft close drawers.
Feeling inspired? Join us at our paint class this weekend! We have just a couple spots left. You can register by clicking here.
Need to stock up on paint? Visit us at our Fall Church store or order online!
Before & After: Creative Save
This week’s before & after feature comes from Kathy – a mother of six & small business owner living in Virginia. Kathy said she, “loves to take on anything DIY,” and we can’t wait to share her creative solution to refresh a yard sale find.
Here’s the before shot of Kathy’s yard sale save.
“I found this beautiful and unique sheet music cabinet on a local Facebook yard sale site. I stained the top with Java Gel Stain, painted the cabinet in Old White, and painted the drawer fronts on Napoleonic Blue. I then used a stencil and Old White to achieve the design on the edge of the drawers. I love how it turned out!”
And here is Kathy’s refreshed piece – a creatively reimagined yard sale find!
Feeling inspired? Our basics paint class is next Saturday 11/7 – and we still have just a few spots left, click here to register.
You can also shop paint and supplies on our website and in our retail store.